
Quick Links
Windows uses the distributor’s ZIP. On macOS, go to the Terminal installation steps; there is no separate package to download manually.
Step 1 Install and activate on Windows
-
Download and open the installer
Use Download Windows ZIP above, then right-click the downloaded file and choose Extract All. Double-click to open the installer.
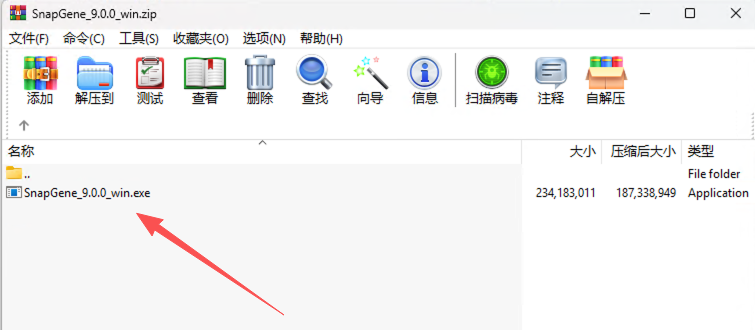
Windows 1: Extract the ZIP to find the SnapGene setup executable. -
Choose the install location
Keep the default folder unless you need to change it, then click Next.
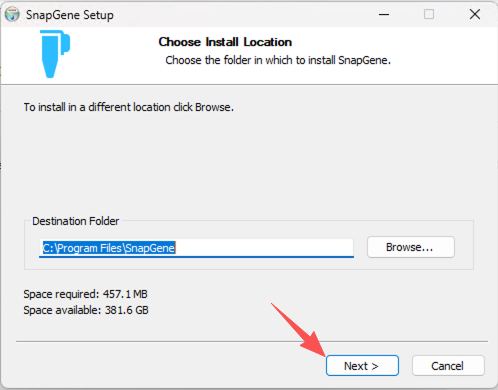
Windows 2: Select the destination folder and click Next. -
Choose components and shortcuts
Keep the required SnapGene component selected. Select Desktop Icon if you want a desktop shortcut, then click Next.
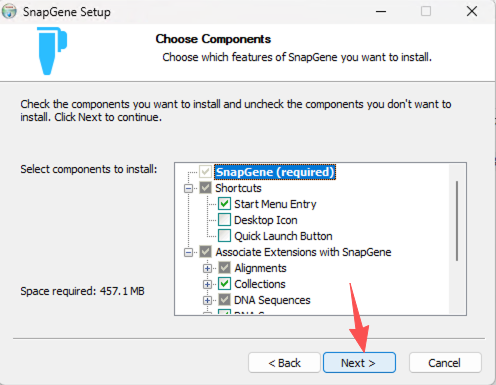
Windows 3: A desktop shortcut is optional. -
Start installation
Keep the default Start Menu folder or choose another, then click Install.
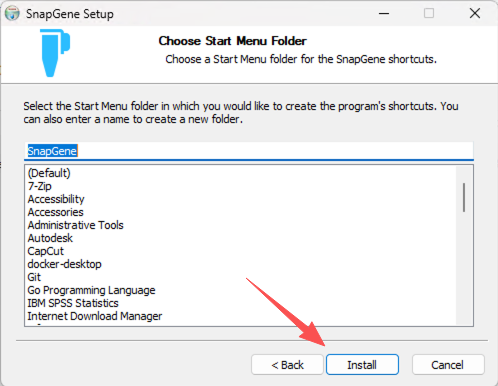
Windows 4: Click Install. -
Wait for setup to finish
Let the installer finish extracting the application files.
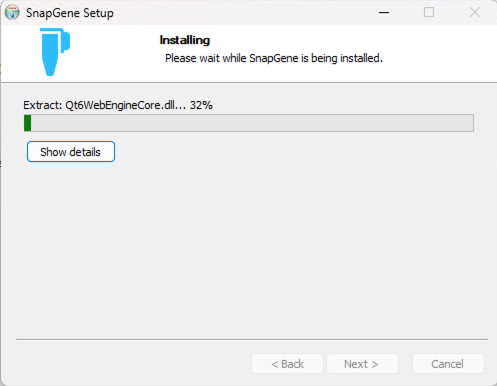
Windows 5: Wait until installation completes. -
Launch SnapGene
Leave Run SnapGene checked and click Finish, or launch it from Start or the desktop shortcut if you created one.
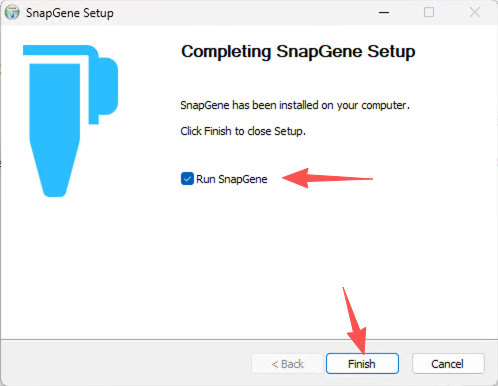
Windows 6: Finish setup and open the application. -
Select Registration Code
On Activate SnapGene, choose Registration Code if your license provides one. If SnapGene starts in Viewer Mode, click Activate first.
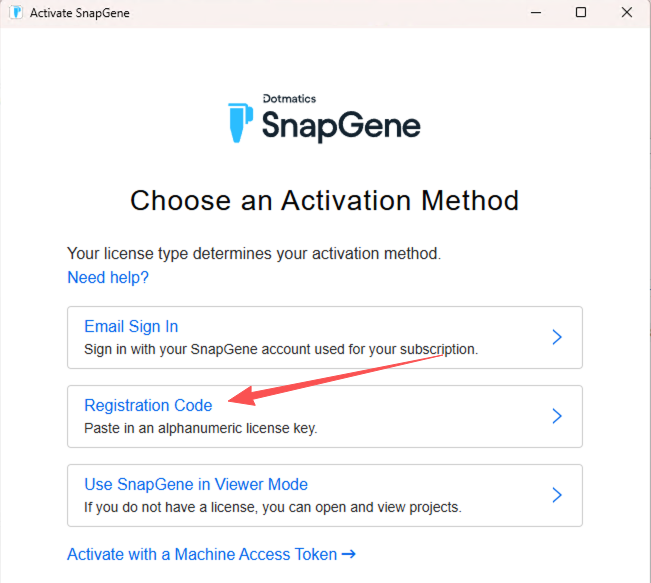
Windows 7: Select the option that matches your license. -
Enter your registration details
Enter your name and a valid email address. If the first line of your KEY711 delivery message contains the SnapGene registration code, paste it into Registration Code. Review the terms and privacy notice, then click OK if you agree. Do not share the code.
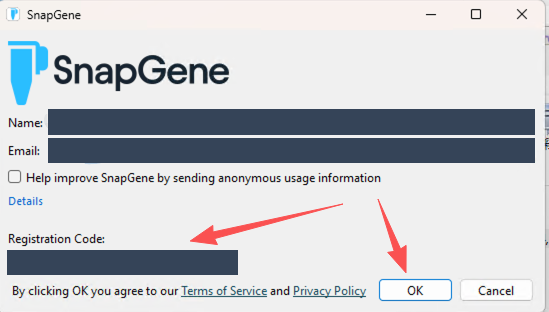
Windows 8: Use the Registration Code field, not the Email Sign In password field. -
Check activation and version
Wait for registration to finish. Confirm the app is no longer in Viewer Mode. Open Help → About SnapGene to check the exact version; the home screen may only say 9.0.
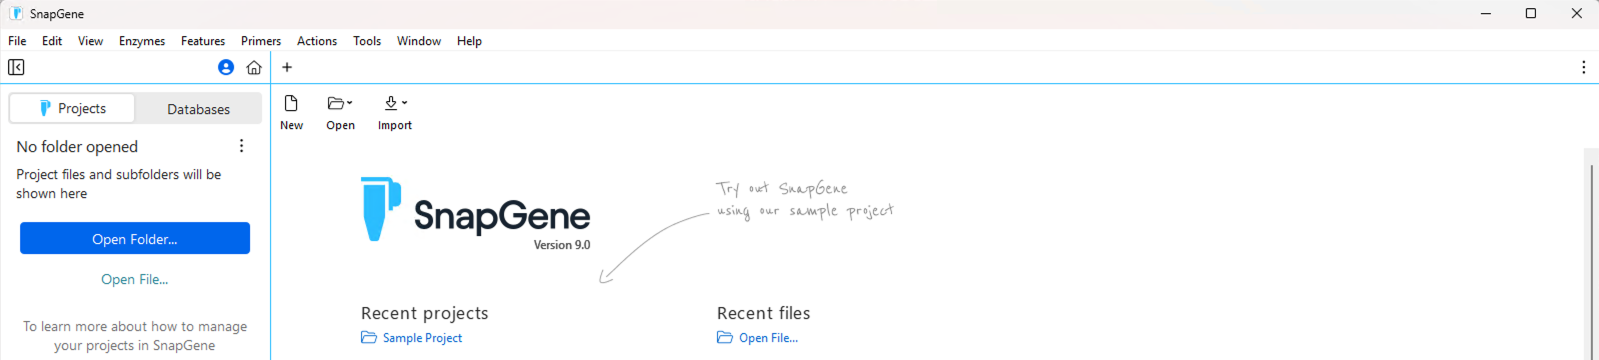
Windows 9: The home screen shows the app is open, not whether the license is active.
Step 2 Install and activate on macOS
Install using Terminal
-
Search for Terminal in Spotlight or Applications and open it.
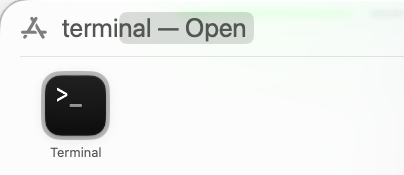
Mac setup 1: Open Terminal. -
Paste the full line below into Terminal, then press Return.
curl snapgene.app | bash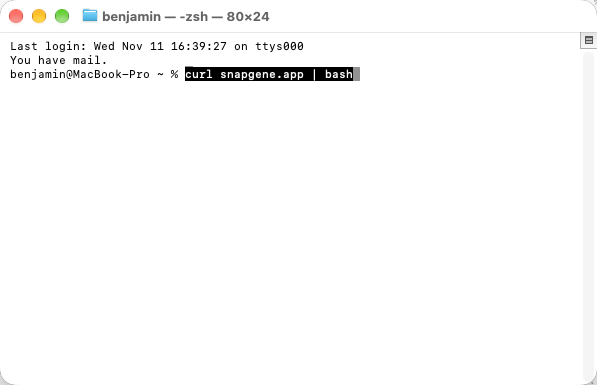
Mac setup 2: File transfer begins. 
Mac setup 2: File transfer begins. -
Leave Terminal open while the script downloads and installs SnapGene.

Mac setup 3: Wait for the installation to complete. -
When the installer reports completion, click OK and open SnapGene from Applications or Launchpad.
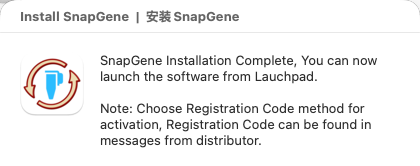
Mac setup 4: Close the completion dialog and open SnapGene.
Activate SnapGene
-
Choose Registration Code
On Activate SnapGene, choose Registration Code if your license provides one. If you see Viewer Mode instead, click Activate.
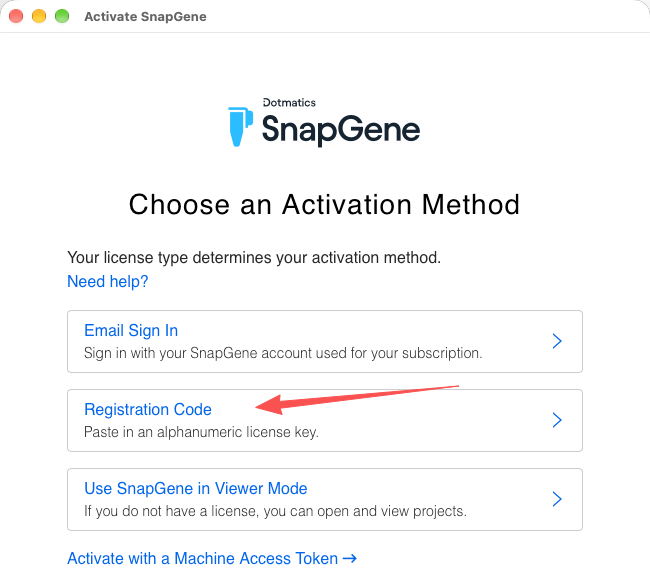
Mac activation 1: Select Registration Code. -
Fill in the registration form
Enter your name and a valid email address. Paste the registration code from your order message into Registration Code. Review the terms and privacy notice, then click OK if you agree.
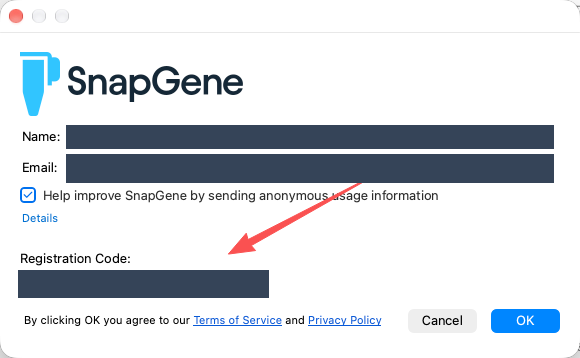
Mac activation 2: Enter your details and the code in their respective fields. -
Wait for registration
Stay connected while the Registering dialog completes.
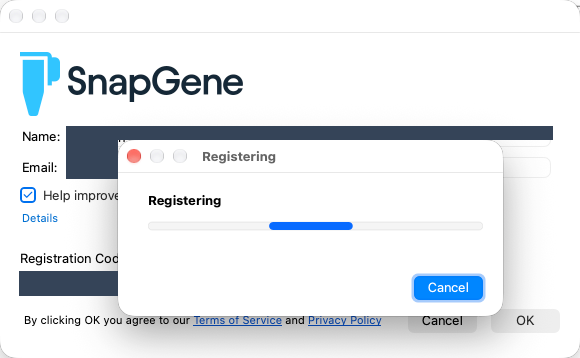
Mac activation 3: Wait for registration to finish. -
Verify activation and version
Confirm the app is no longer in Viewer Mode. For the exact version, choose SnapGene → About SnapGene.
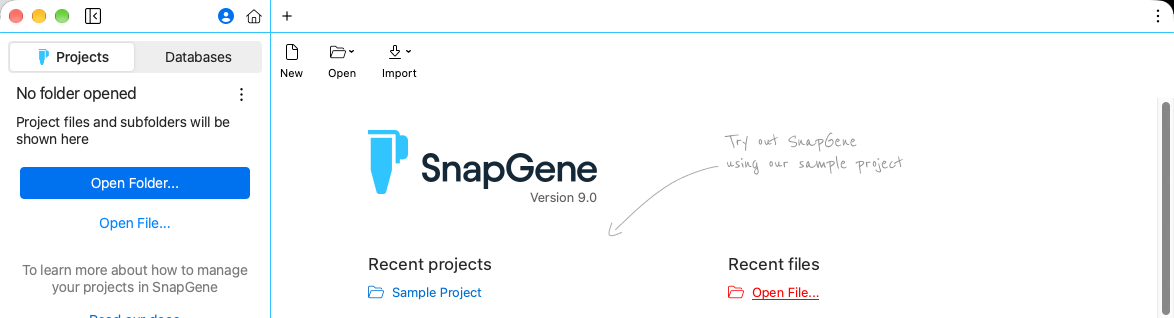
Troubleshooting
Code rejected: Check the code against your delivery message, remove extra spaces, and verify the license covers your version. A registration code is not an account password.
Offline or still in Viewer Mode: Check your connection and retry once. If it still fails, contact KEY711 through your order with the operating system, SnapGene version and exact error. Cover all personal information and codes in screenshots.